
Cheesy Garlic Chicken Wraps
This dinner is great for people with big appetites since it has juicy, seasoned chicken, melted cheese, and toasty tortillas all in one. These Cheesy Garlic Chicken Wraps use basic ingredients and strong flavors to make an ordinary wrap into something you really want to eat. They bring restaurant-quality food straight to your kitchen table.
I made these wraps for a casual family meal last week, and my picky teenager requested if we could add them to our weekly menu. That’s when I knew this recipe was really something special: it combines quick and easy cuisine with comforting comfort food.
Crispy tortillas with melted cheese and creamy garlic sauce around golden chicken. An easy meal that takes only 25 minutes to make.
Time to Get Ready: 10 Minutes
Time to Cook: 15 Minutes
Time: 25 Minutes
Important Parts

- Choose chicken breasts that are plump and the same size so they cook evenly. If you want them to brown better, pat them dry before seasoning.
- Look for big, fresh flour tortillas that are soft. The better the tortilla wraps, the fresher it is.
- Cheese blend: For flavor, mix sharp cheddar with mozzarella to get that perfect melty stretch.
- Garlic powder: Fresh garlic might burn, but powder always tastes good.
- A mix of onion powder, paprika, salt, and pepper adds dimension to the dish.
- Creamy garlic sauce: It adds moisture and brings all the tastes together.
- Two big chicken breasts, cut into pieces
- Four big flour tortillas
- 1 tablespoon of olive oil
- 2 teaspoons of garlic powder
- 1 teaspoon of onion powder
- 1 teaspoon of paprika
- Add salt and pepper to taste.
- 1 cup of shredded cheddar cheese
- 1/2 cup of shredded mozzarella cheese
- 1/2 cups of creamy garlic sauce
- Chopped fresh parsley
Things You’ll Need
- Pan that doesn’t stick
- Bowl for mixing
- Knife and cutting board
How to Make the Best Cheesy Garlic Chicken Wraps
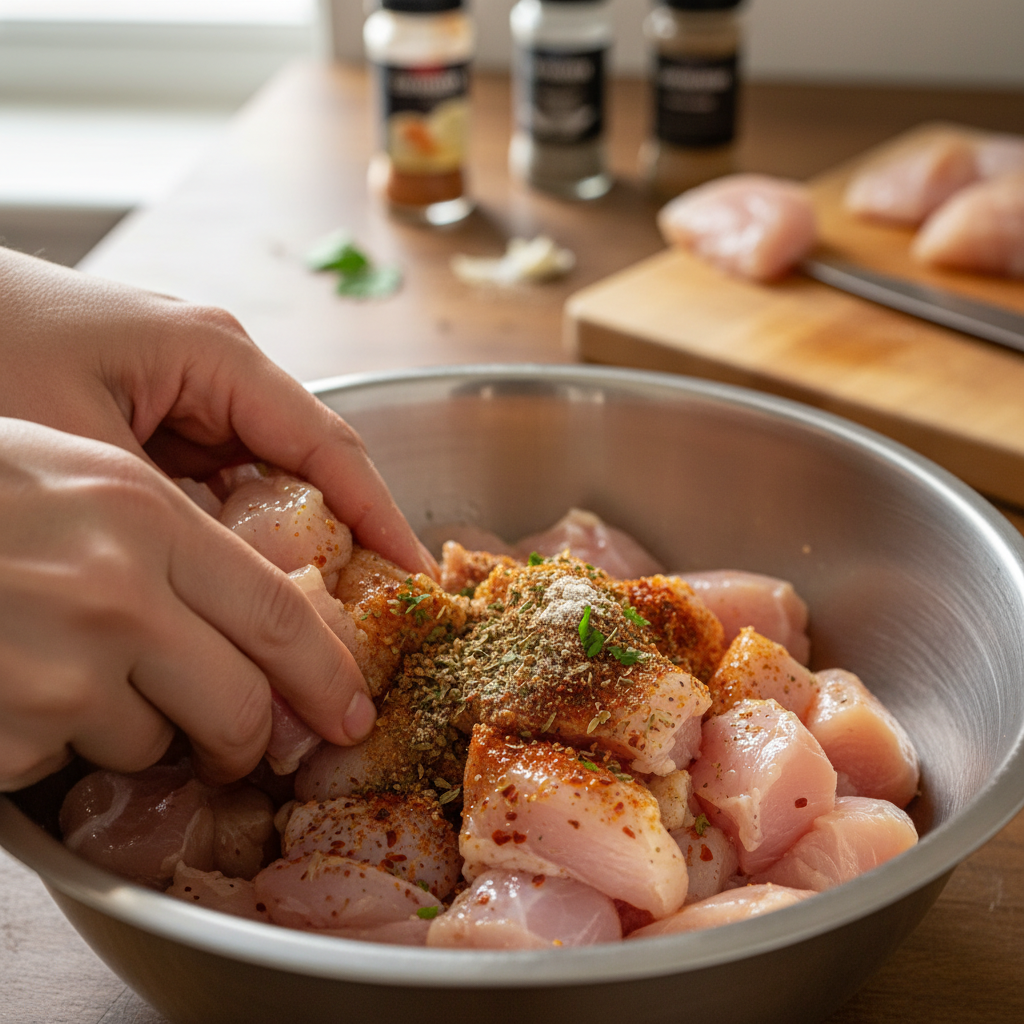
- Cut the chicken into even, bite-sized chunks to start. About 1/2 inch cubes work best. Put them in a mixing bowl with olive oil and spices and mix them up. Make sure that every piece gets a good coat. While you get the other ingredients ready, let them sit for five minutes to soak up the flavors.
- Put your pan on medium heat and let it get hot but not smoking. Put the seasoned chicken in a single layer; don’t crowd the pan. If you need to, work in batches. Let each piece get a golden crust on both sides before stirring, which should take about 3 minutes. The chicken should be fully cooked but still juicy. Take it off the heat and let it cool down a bit.
- Put the tortillas on a flat surface. If you heat your tortillas a little, they will be easier to work with. Spread a thick layer of garlic sauce on each one, but leave a border around the edges. Put the chicken you just cooked in the middle, then evenly sprinkle both kinds of cheese on top.
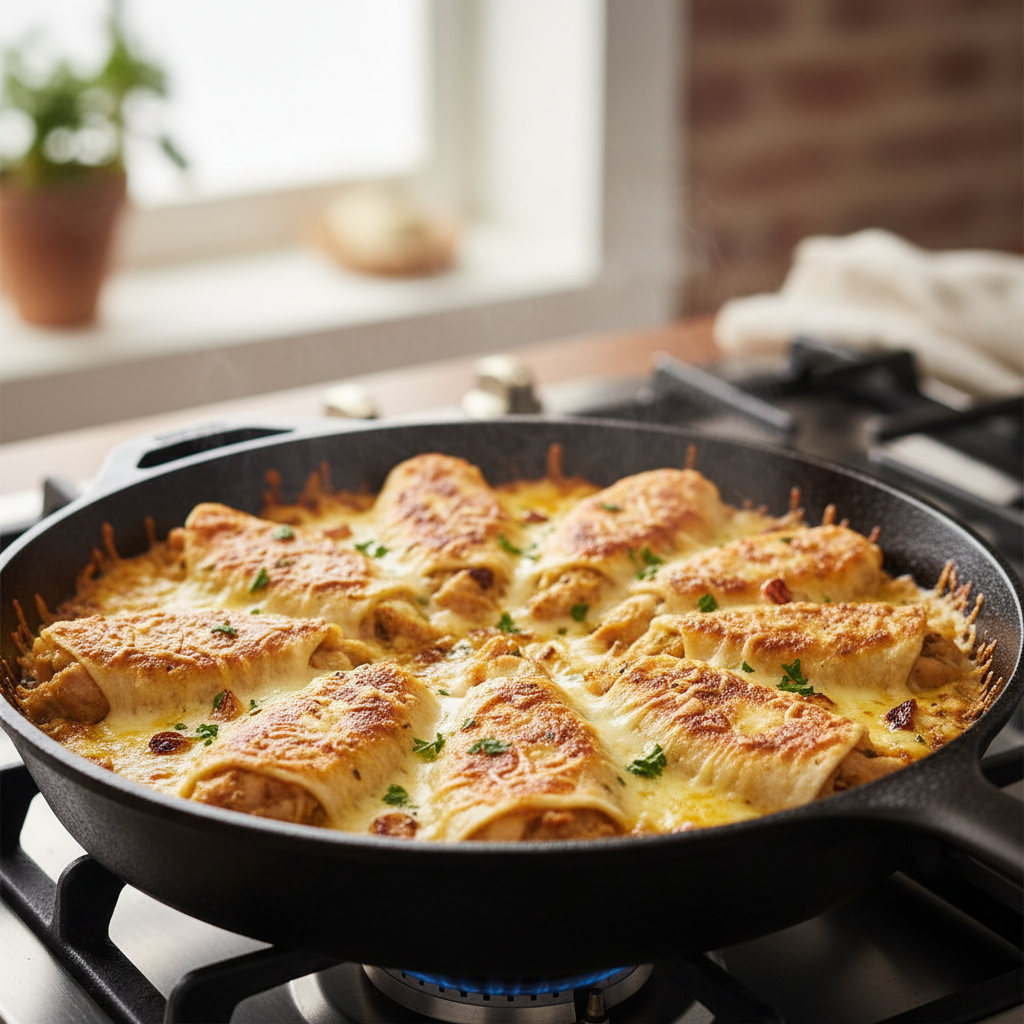
- Lift the bottom edge over the filling, then fold in both sides. Start at the bottom and roll tightly, tucking in the sides as you go. A tight roll keeps the filling from falling out while it cooks. Put the tortillas back in the pan over medium-low heat. Use a spatula to gently press down on the edges to help seal them. For about 2 to 3 minutes on each side, cook until the food is golden brown and crispy. The cheese should be fully melted.
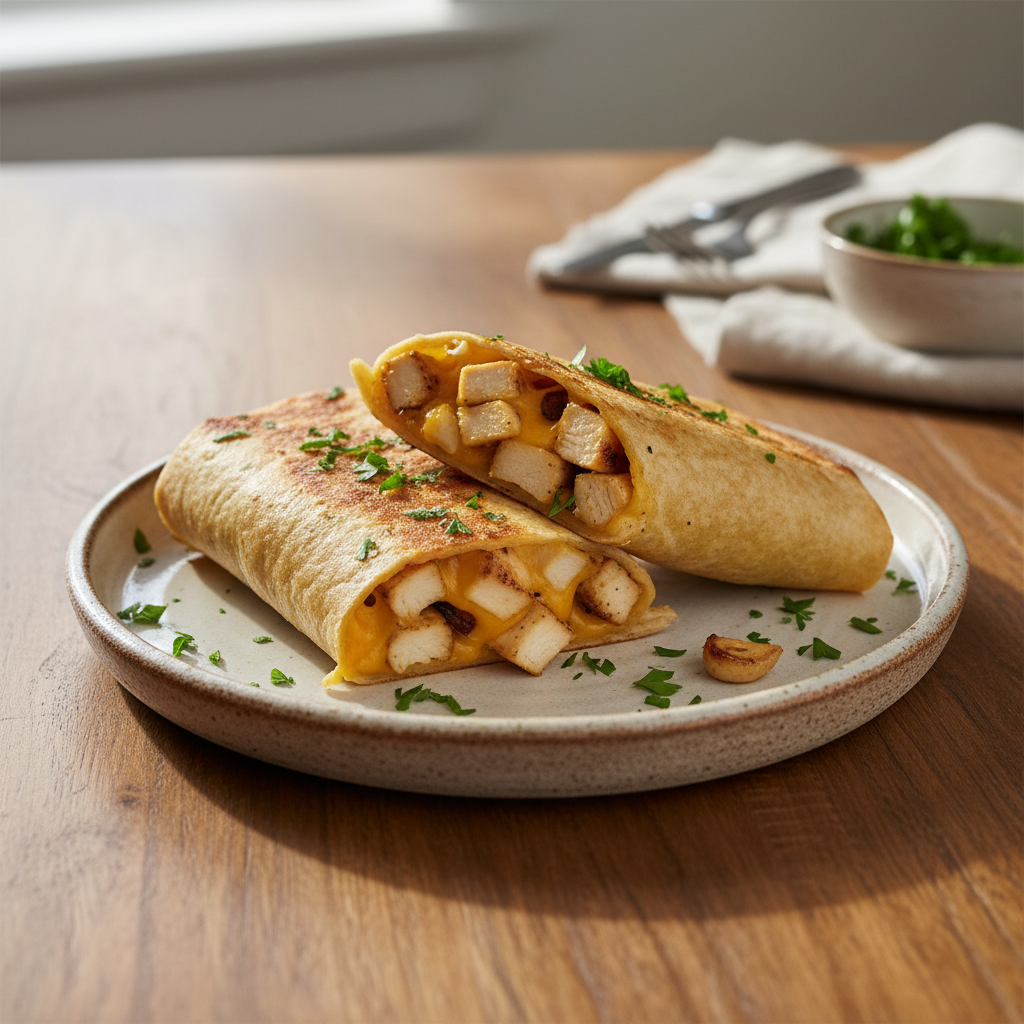
- Take the wraps out of the pan and cut them in half. If you want, you can add freshly chopped parsley as a garnish and serve right away.
Notes
- It tastes great with a side of fresh salad or garlic sauce for dipping.
- For a spicier wrap, add red pepper flakes to the chicken seasoning.
My daughter found out that putting a thin layer of cream cheese on top of the garlic sauce makes these wraps even more delicious. This is now our special weekend version of a family favorite.
Suggestions for Serving
I like to eat these with a light cucumber salad or sweet potato fries. The fresh crunch is a perfect counterpoint to the rich, cheesy filling.
Different Creative Ideas
For more vegetables, I sometimes add sautéed peppers and onions, or I use pepper jack cheese instead of regular cheese for a spicy kick. The basic recipe is just the beginning of what you can do with it.
The Magic of Meal Prep
Make more seasoned chicken and keep it separate from the tortillas. You can quickly make fresh wraps whenever you want them during the week.
Tips for Making Ahead
You can get everything ready ahead of time and keep them in separate containers. Put them together and give them a final crisp in the pan when you’re ready to eat.
Advice from a Professional Chef
- Before adding the chicken, make sure your pan is hot enough. This will help it brown better.
- The best way to melt cheese is to grate it fresh.
- If you’re using leftover chicken, heat it up a little bit before putting the wraps together.
These wraps are my favorite thing to make for busy weeknights when we want something filling but don’t have time to cook for hours. They remind me that the simplest combinations can make the best meals.
Questions that come up a lot
- → Is it possible to make these wraps ahead of time?
- You can cook the chicken ahead of time, but for the best results, put the wraps together and grill them right before serving.
- → How do you best reheat leftover wraps?
- To keep the tortilla crispy, heat it in a pan on medium heat for 2 to 3 minutes on each side.
- → Is it okay to use rotisserie chicken instead?
- Yes, just shred it and heat it up with the spices in a pan before putting the wraps together.
- → What can I use instead of sauce with garlic?
- You can use ranch dressing, chipotle mayo, or any other creamy sauce instead.
- → Can I put these wraps in the freezer?
- They can be stored, but they taste best when they’re fresh. Wrap each piece separately before freezing and then reheat in a pan for the best texture.
Nutrition Information (For Each Serving)
It’s important to remember that this information is only an estimate and should not be used as definitive health advice.