
Classic Chocolate Fudge Recipe
Homemade chocolate fudge has a mystical quality. It melts in your tongue and is rich and creamy. In other words, it’s happiness in a bite! The best thing is? You only need a few basic ingredients, and it’s surprisingly easy to make.
This classic chocolate fudge is sure to hit the mark, whether it’s for a holiday, a gift, or just because you want something sweet.
Let’s get going!
Things You Will Need:
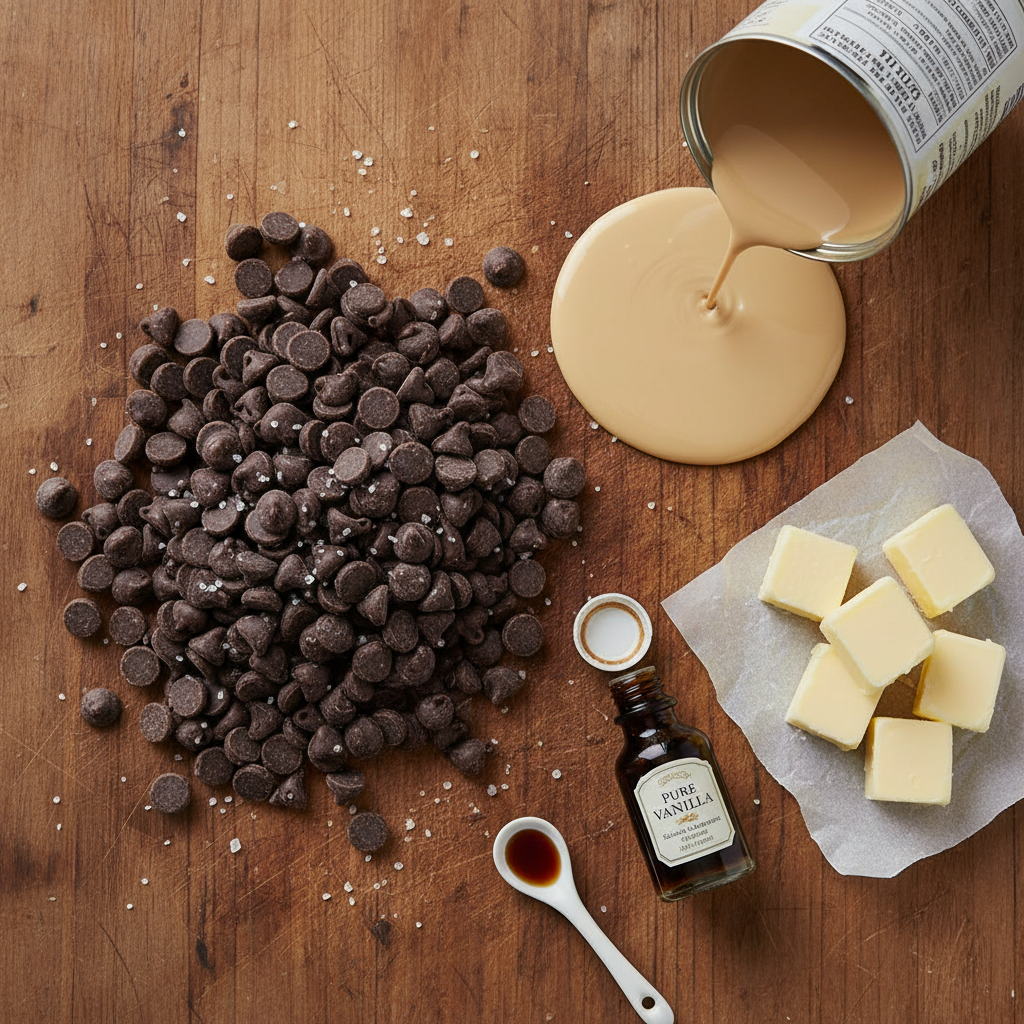
- Three cups of semi-sweet chocolate chips
- A can of sweetened condensed milk (14 oz)
- Four tablespoons of butter without salt
- 1 teaspoon of vanilla extract
- A pinch of sea salt
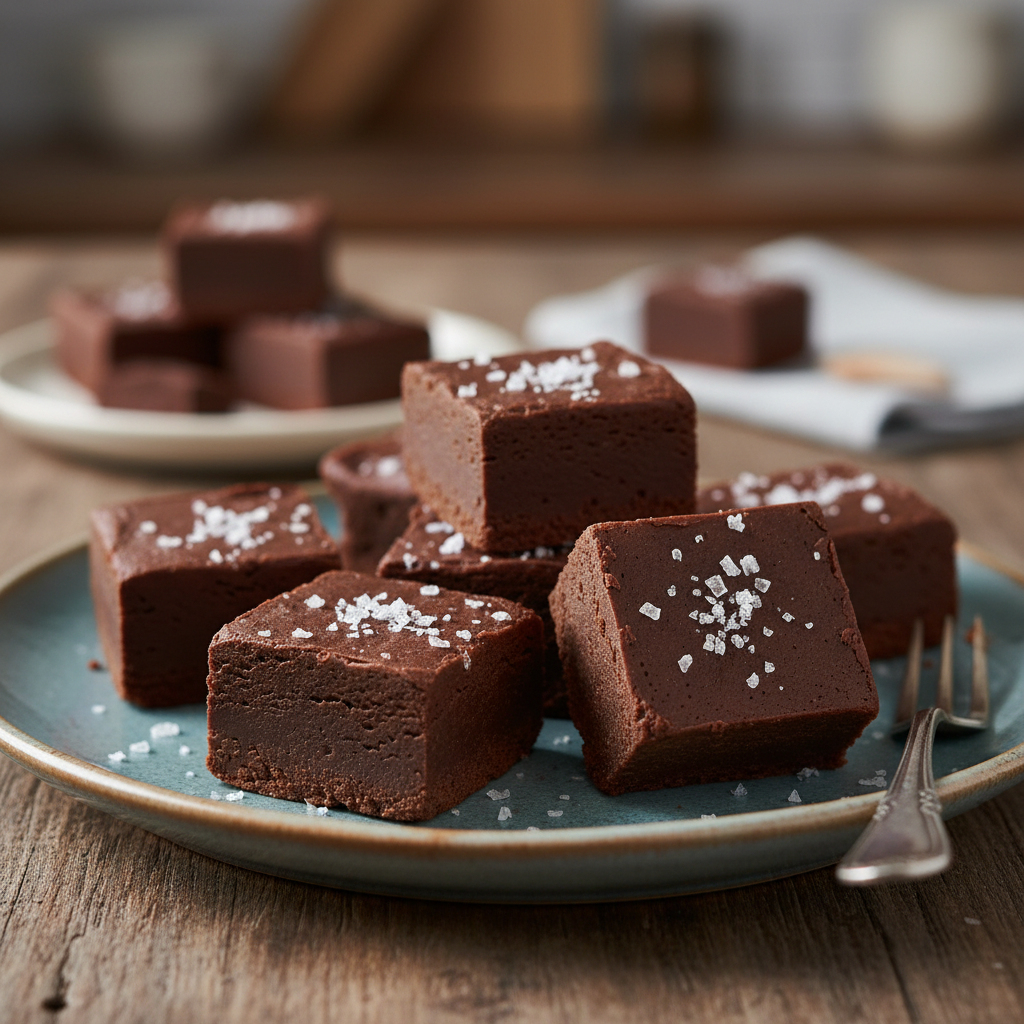
You can add chopped nuts, sprinkles, or a tiny sprinkling of sea salt on top if you choose.
Tools:
- A medium-sized saucepan
- Spatula that won’t melt
- 8 by 8 inch baking pan
- Paper made with parchment
- Spoons and cups for measuring
How to do it
- Melt the chocolate
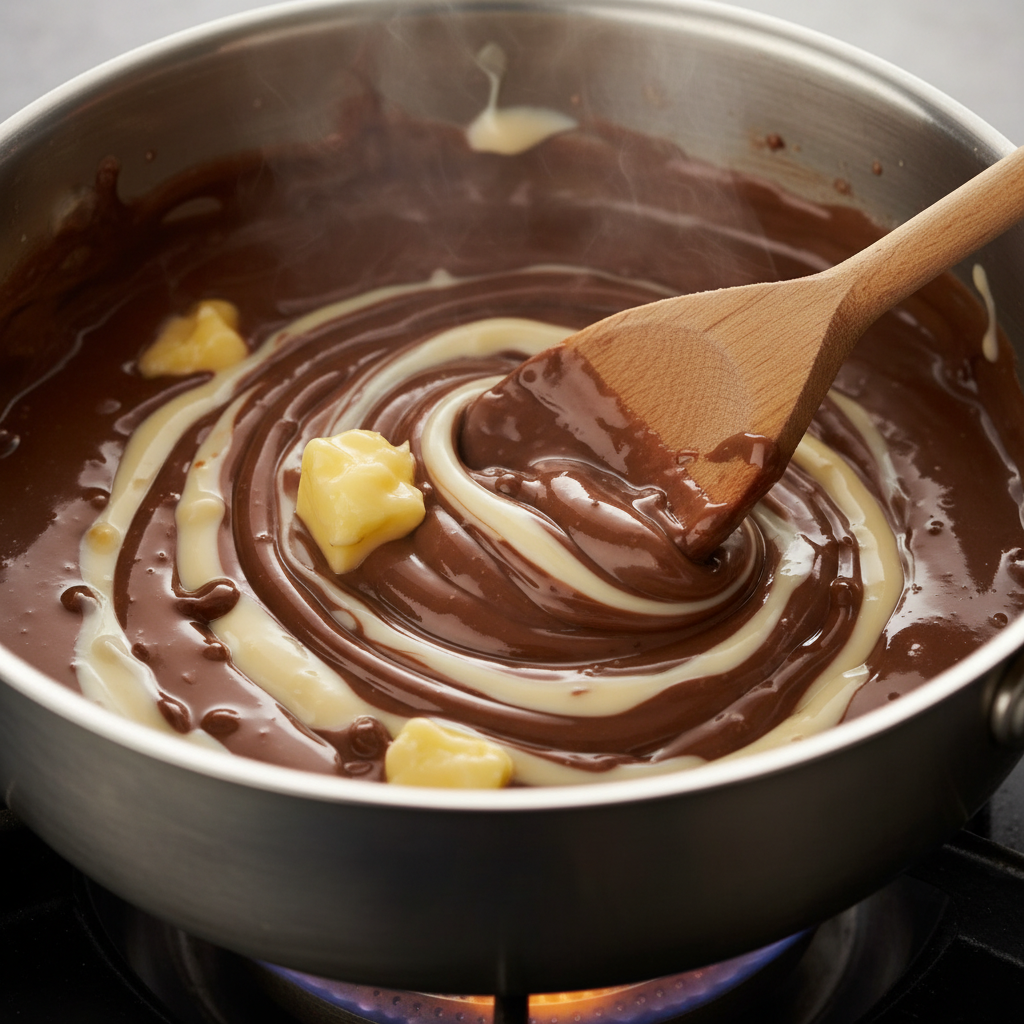
Put the chocolate chips, sweetened condensed milk, and butter in a medium-sized pot. Heat over low heat, stirring constantly with a spatula, until the mixture is completely melted and smooth.
- Add salt and vanilla
Take the saucepan off the heat once the butter has melted. Mix in the vanilla extract and a pinch of sea salt until everything is well mixed. - Put it in the pan
Put the chocolate mixture in a baking pan that is 8 inches by 8 inches and has parchment paper on the bottom. Use a spatula to smooth out the top. If you want to add toppings, make sure they are equally spread out over the top. - Let the fudge cool down
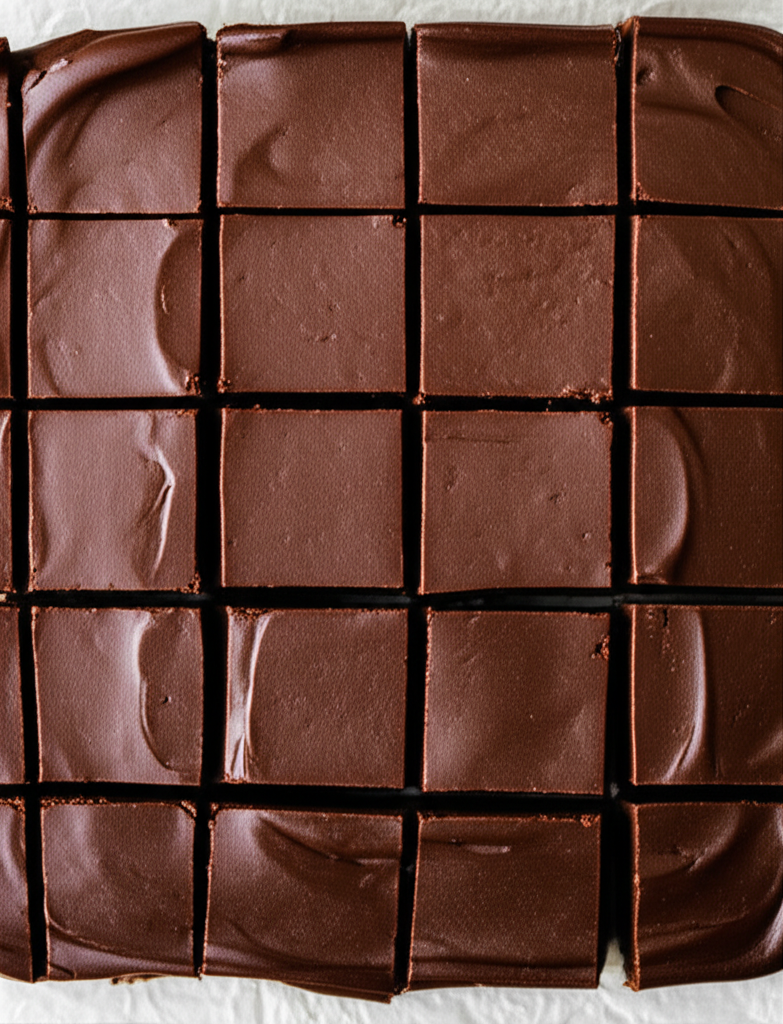
Put the pan in the fridge and let the fudge harden for at least 2 to 3 hours, or until it is solid. - Cut and serve
Take the fudge out of the pan after it is solid by using the parchment paper. Use a sharp knife to cut into small squares and serve!
Helpful Tips
- Use high-quality chocolate. The taste will be very different depending on how good your chocolate chips are.
- Get your pan ready first. Put parchment paper on the bottom of the baking pan, leaving some hanging over the edges so it’s simple to take off.
- Don’t become too hot. To keep from scorching the chocolate, melt it over low heat. It’s better to take your time.
- Use your imagination when it comes to toppings. For a creative twist, try adding nuts, crushed candy canes, or even a drizzle of caramel.
- Wait until it is totally set. Wait until the fudge has cooled in the fridge before cutting it. It’s worth the wait!
Changes and substitutions
- No dairy? For a vegan variation, use coconut condensed milk and dairy-free chocolate chips.
- Different tastes. For a different taste, use peppermint or almond extract instead of vanilla extract.
- Add-ins. Before the fudge sets, mix in some crushed cookies, marshmallows, or dried fruit.
Leftovers and Storage
You may keep fudge in the fridge for up to two weeks if you put it in an airtight container.
If you want to keep the fudge for a long time, freeze it in a container that can go in the freezer for up to three months. Before eating, just thaw it in the fridge.
In conclusion
This Classic Chocolate Fudge is the best dessert for any event. It’s chocolatey, creamy, and so simple to make that you’ll never want to buy fudge from the store again! Give it a try and tell me in the comments how it came out or if you added your own toppings. Enjoy your treats! 🍫✨