
Fudgy Red Velvet Brownies Recipe
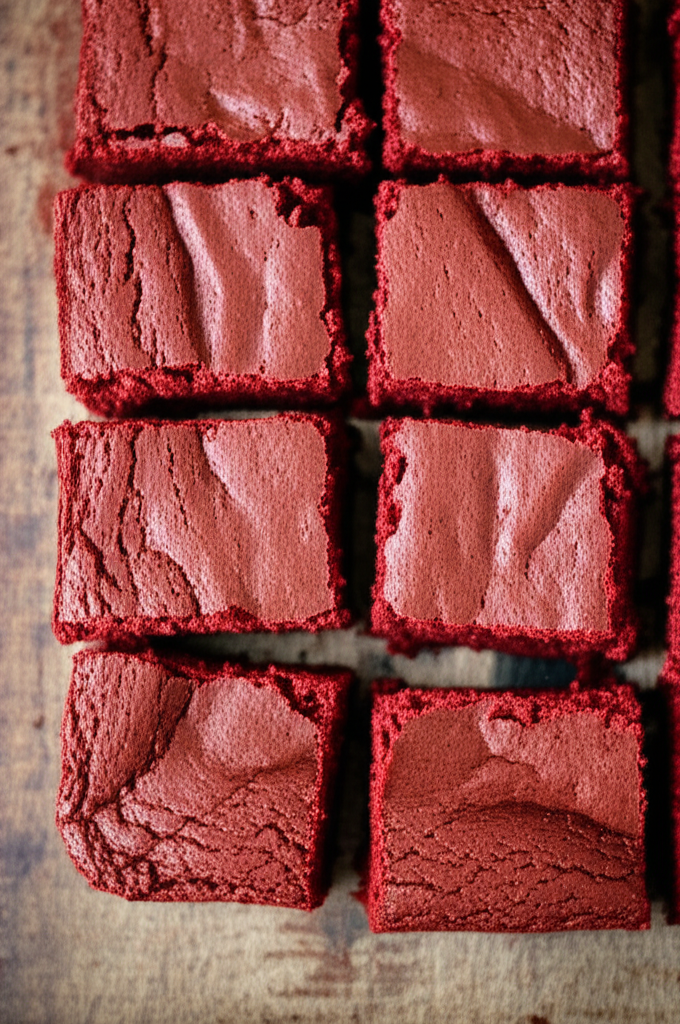
If you want to treat yourself to a rich, chocolatey dessert any time of year, these fudgy red velvet brownies are the best way to do it. They are as beautiful as they are tasty, with the brightest crimson color and the classic red velvet flavor. Plus, their fudgy, gooey texture will make you want more every time!
About This Brownie Recipe
This brownie recipe is the best one to use if you ever want a tasty red velvet treat. This brownie is thick and fudgy, just like a typical brownie, but it has red velvet tastes.
Also, you can make this dish for more than just Valentine’s Day. You can make it for Christmas, a baby shower, or any time you want something sweet and tasty!
You adore red velvet recipes, so try these Easy Crumbl Red Velvet Cupcake Cookies, this Small Batch Red Velvet Cupcakes Recipe, or this Edible Red Velvet Cookie Dough Recipe.
What sets red velvet brownies apart?
The taste of red velvet pastries originates from a mix of acidic substances like buttermilk or vinegar and the slight bitterness of cocoa powder that isn’t sweet. Red velvet brownies are different from conventional brownies because they have a perfect mix of tangy and chocolate flavors, and the red gel food coloring gives them the most beautiful color.
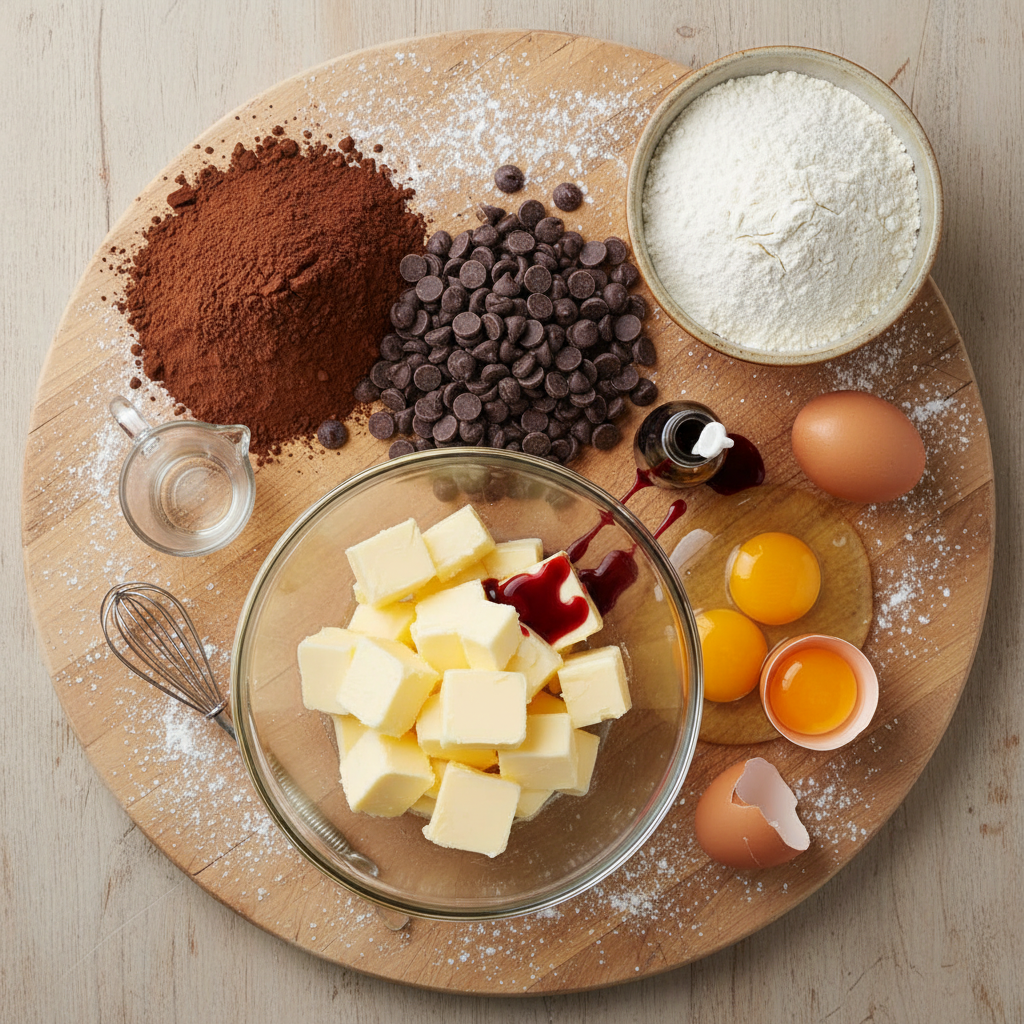
What you need to make these fudgy red velvet brownies
For the exact amounts of each ingredient, be sure to scroll down to the recipe card at the bottom of the page.
- Butter: Makes things richer and gives them that fudgy texture.
- Chopped semi-sweet chocolate bar: For a strong chocolate taste (chocolate chips work too!).
- Granulated Sugar: Makes the brownies taste just right.
- Eggs: Give it structure and make it chewy.
- Vanilla extract: This makes the chocolate taste better.
- White vinegar: An important part of getting that iconic red velvet flavor.
- Red Food Coloring: Gives it the classic red velvet color. I like to use gel food coloring instead of liquid food coloring since it makes the color stand out more.
- Unsweetened Cocoa Powder: For a light chocolate flavor.
- All-Purpose Flour: Gives the brownie its shape.
- Salt: Just a little bit will bring out the other flavors and balance off the sweetness.
How to Make These Fudgy Red Velvet Brownies
For the best results, be sure to scroll down to the recipe card at the end of this post for the full step-by-step directions.
-
- Grease or line an 8×8 inch baking sheet with parchment paper and turn on the oven.
- In a microwave-safe large mixing bowl, melt the butter and chopped chocolate in 30-second intervals. Use a whisk to mix it until it is completely melted.
- Put the granulated sugar into the melted butter and chocolate and mix it all together with an electric mixer on medium speed.
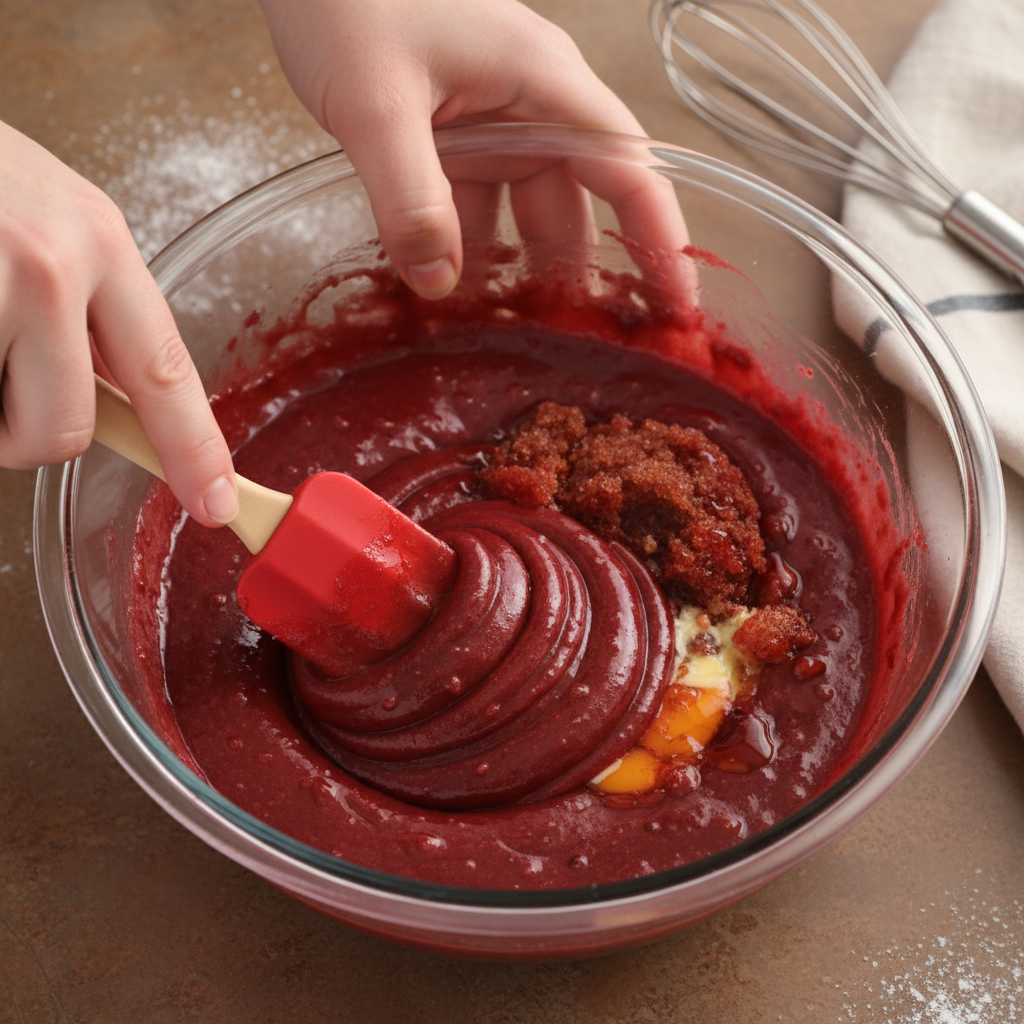
- Then, add the eggs one at a time, beating vigorously after each one. Next, add the red food coloring, white vinegar, and vanilla extract and mix well.
- Put the cocoa powder, flour, and salt in a big bowl and mix them together.
- Mix the dry ingredients into the wet ingredients little by little until they are barely mixed. Don’t mix too much.
- If you choose, you can fold in any mix-ins, such white chocolate chips, into the brownie mixture.
- Put the red velvet brownie batter into the pan that has been prepared and smooth it out evenly. Use a rubber spatula to scrape the sides of the bowl to get every last drop.
- Put the batter in the preheated oven and bake it until a toothpick inserted into the center comes out with a few moist crumbs (not wet batter).
- Let the brownies cool all the way down to room temperature in the pan before cutting them into squares using a sharp knife.
I used a whisk and a rubber spatula to prepare these brownies, but you can also use a stand mixer or an electric hand mixer.
The Best Recipe for Fudgy Red Velvet Brownies
Brownies with Red Velvet
These fudgy red velvet brownies are a simple chocolatey snack that will hit the spot when you want something sweet.
- Time to get ready: 15 minutes
- Time to cook: 30 minutes
- In all: 45 minutes
- Servings: 16 servings
- 3/4 cup of butter that hasn’t been salted melted
- 2 ounces of chopped semi-sweet chocolate bar
- 1 and 1/4 cup of sugar
- 2 big eggs
- 2 teaspoons of vanilla extract
- 1 teaspoon of white vinegar
- 1/2 tablespoon of red gel food coloring
- 2 teaspoons of cocoa powder without sugar
- 1 and 1/4 cups of all-purpose flour
- 1/4 teaspoon of salt
- You can stir in 1/2 cup of white chocolate chips into the recipe or melt them and pour them over the brownies.
-
- Set the oven to 350°F and line an 8×8 inch baking tray with parchment paper.
- In a big mixing basin that can go in the microwave, melt the butter and chopped chocolate in 30-second bursts. Stir until everything is completely melted.
- Mix in the granulated sugar until everything is thoroughly mixed, then add the eggs one at a time, beating well after each one. Add the red food coloring, white vinegar, and vanilla extract and mix well.
- Put the cocoa powder, flour, and salt in an other basin and mix them together.
- Slowly stir the dry ingredients into the wet ingredients until they are just mixed. Don’t mix too much. If you want, you can mix in white chocolate chips with the brownie mixture.
- Put the batter in the 8×8 inch pan that you have just prepared and spread it out evenly.
- Bake in the oven that has already been heated for about 30 to 35 minutes, or until a toothpick inserted into the center comes out with a few moist crumbs (not wet batter).
- Let the brownies cool all the way down in the pan before you cut them into squares.
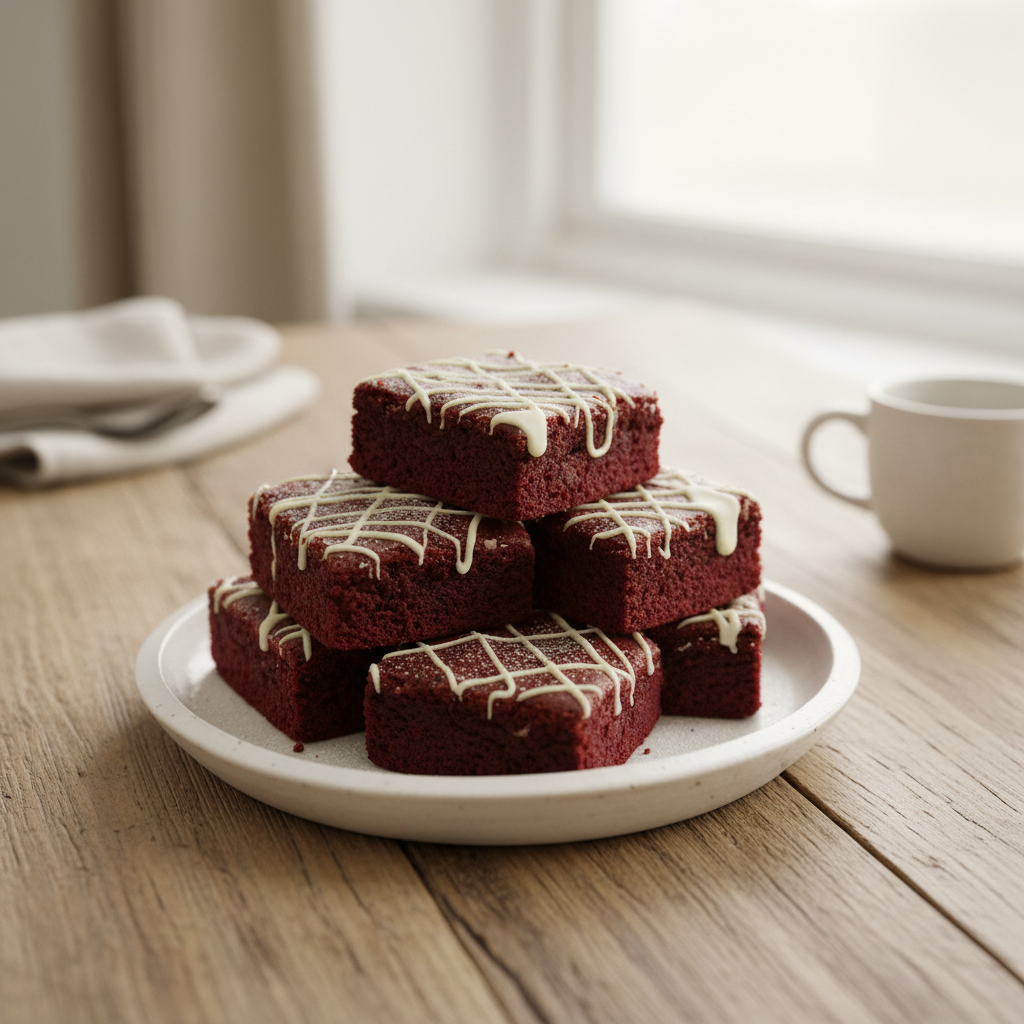
- You can sprinkle melted white chocolate on top if you want, let it set, cut it, and enjoy!
Why You Should Make This Recipe!
- These brownies are soft, gooey, and melt-in-your-mouth tiny pieces of bliss.
- The red velvet flavor is what makes these brownies so remarkable. The slight cocoa tang and beautiful crimson color are what make them so special.
- These brownies are great for any event, from Valentine’s Day to Christmas.
- Easy baking: Simple processes, basic ingredients, and great results every time.
Questions that come up a lot—FAQ
How to make the best fudgy red velvet brownies
- Don’t mix the batter too much: This makes sure that the texture is always soft and fudgy.
- Use gel food coloring to get a bright red hue without adding too much liquid.
- Check for doneness: When you stick a toothpick in the brownies and it comes out with a few moist crumbs (not wet batter), they are done. You should never bake brownies too long because they won’t be as fudgy as they should be.
How to Keep Fudgy Red Velvet Brownies That Are Leftover
Store in an airtight jar on the kitchen counter for three days, in the fridge for a week, or in the freezer for a couple of months.
Put the brownies in a freezer bag or container that won’t let air in and freeze them for up to two months.
Can I put things on top of red velvet brownies?
Sure! A light dusting of powdered sugar or a sprinkle of heart-shaped candies will give it a lovely and festive Valentine’s Day look.
You may also add some more taste and creaminess by spreading on some rich cream cheese icing. To make it seem beautiful for Valentine’s Day, don’t forget to add some pink or red color to it.
What other flavors or mix-ins work best here?
- Mix-Ins: Chopped peanuts or white chocolate chips would make the brownies more interesting to eat.
- Swirls: Melt some peanut butter or caramel sauce in a bowl, pour it over the batter, then use a toothpick to swirl it in.
- Make a cookie dough and brownie batter at the same time, then bake them together to make a red velvet brookie!
Where did red velvet pastries come from?
The first red velvet desserts were from the early 1800s. The “velvet” texture meant that the cakes had a fine, soft crumb. The rich red hue came about naturally when unprocessed cocoa powder, which is more acidic than the cocoa powder that is used today, reacted with things like buttermilk or vinegar. These acidic things bring out the scarlet tones in the cocoa and give these treats their signature look without any extra food coloring! Isn’t that crazy?
As processed cocoa powder grew more widespread, the original red color slowly faded away. Bakers started adding red food coloring to preserve that famous color, and this is now the standard technique to create this dish. The distinctive taste, which is a mix of milk chocolate and sour notes from the vinegar or buttermilk, is what makes this delicious treat so popular.