
Salmon with Garlic Lemon Butter Sauce
Salmon with Garlic Lemon Butter Sauce is a classic and fancy recipe that brings out the inherent flavors of fresh salmon and adds the bright, zesty flavor of lemon and the rich, creamy taste of butter. You can simply make this lunch at home and it tastes like it came from a restaurant. Here is a full recipe:
Ingredients for the Salmon
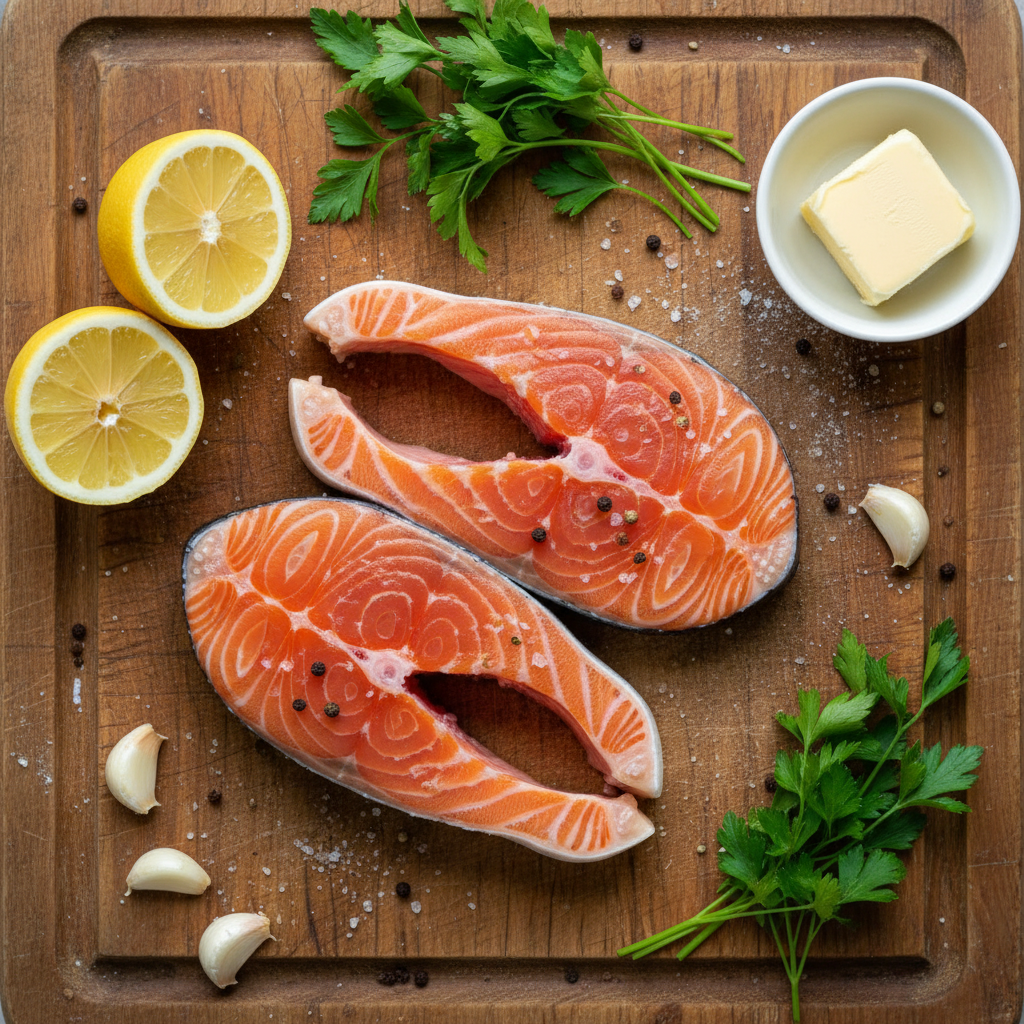
- 4 salmon fillets, each weighing 6 to 8 ounces, with or without skin
- Salt and black pepper to taste
- Two teaspoons of olive oil
- 1 teaspoon of paprika (optional, for more taste)
Ingredients for the Garlic Lemon Butter Sauce
- 4 cloves of garlic, chopped up
- About 2 lemons make 1/4 cup of fresh lemon juice
- The zest of one lemon
- 1/2 cup of butter that isn’t salted
- 2 tablespoons of fresh parsley, chopped up
- Salt and black pepper to taste
Instructions
1. Get the salmon ready:
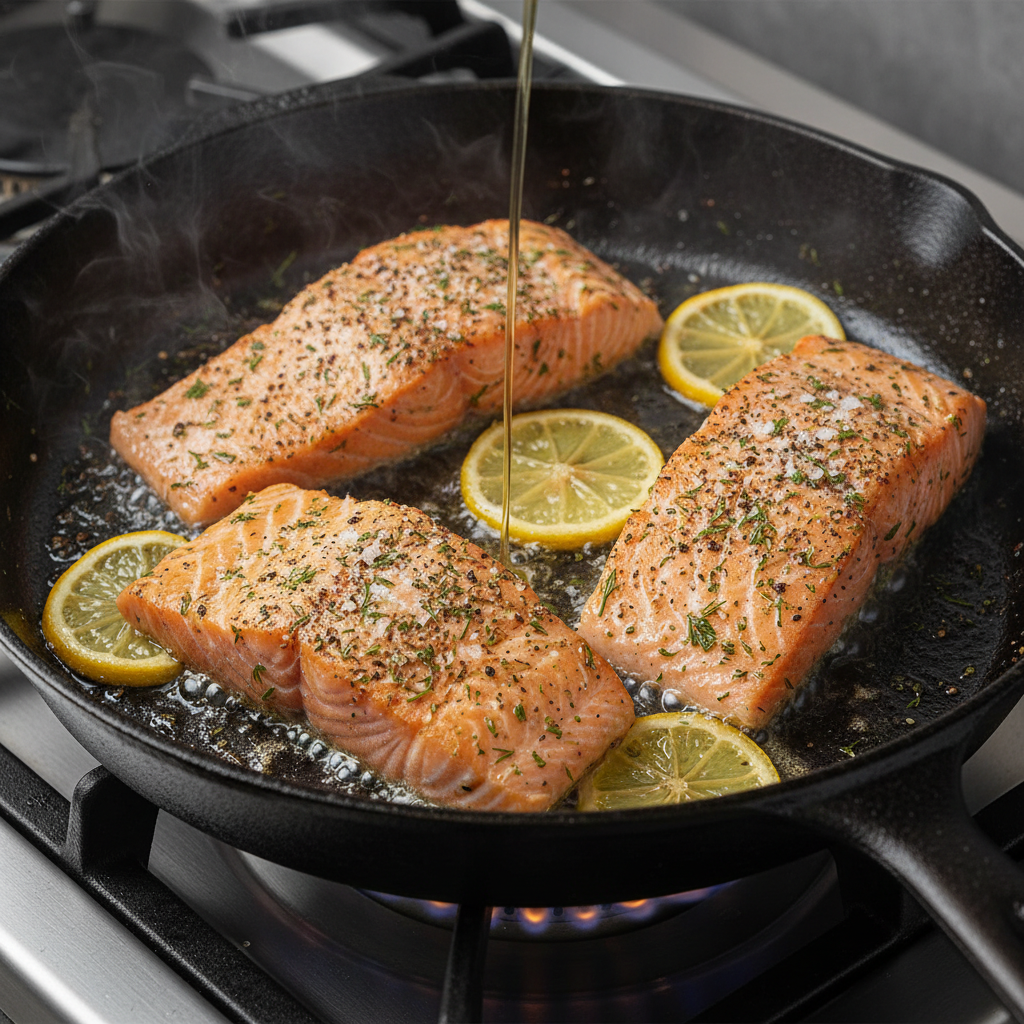
First, dry the salmon fillets with paper towels. Add a lot of salt, black pepper, and paprika (if using) on both sides of the salmon.
2. Sear the salmon:
Put 2 tablespoons of olive oil in a big skillet that can go in the oven and heat it over medium-high heat.
If the salmon has skin, carefully put the fillets in the skillet with the skin side down.
Sear the salmon for three to four minutes on one side, or until it has a golden-brown crust. To get a decent sear, don’t move the salmon around too much at this phase.
For another 2 to 3 minutes, turn the salmon over and sear the other side.
3. Finish cooking in the oven:
You can put the skillet right in a preheated oven at 375°F (190°C) if it is safe to do so. If not, put the seared salmon fillets on a dish that can go in the oven.
Put the salmon in the oven and roast it for 10 to 12 minutes, or until it is done to your liking. When salmon is done, it should be easy to flake with a fork and have a slightly cloudy center.
4. Get the Garlic Lemon Butter Sauce ready:
Make the sauce while the fish cooks. Over medium heat, melt 1/2 cup of unsalted butter in a separate pot.
Put the minced garlic in the melted butter and cook for 1 to 2 minutes, or until it smells good but doesn’t brown.
Add the lemon juice and zest, and let the mixture boil for another 2 to 3 minutes, or until it thickens and reduces a little.
Add salt and black pepper to the sauce to taste. Change the seasoning to suit your taste.
5. Mix and serve:
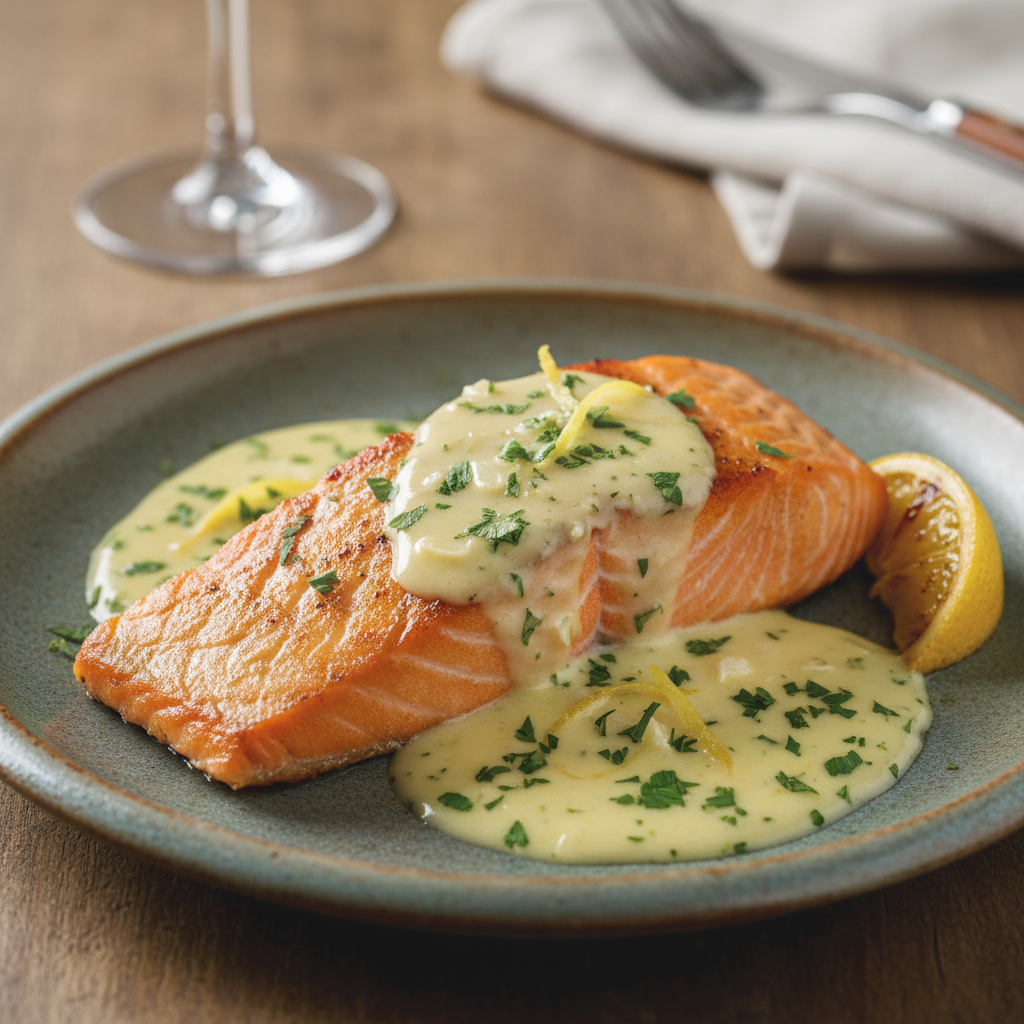
Take the salmon out of the skillet or dish once it has done cooking in the oven.
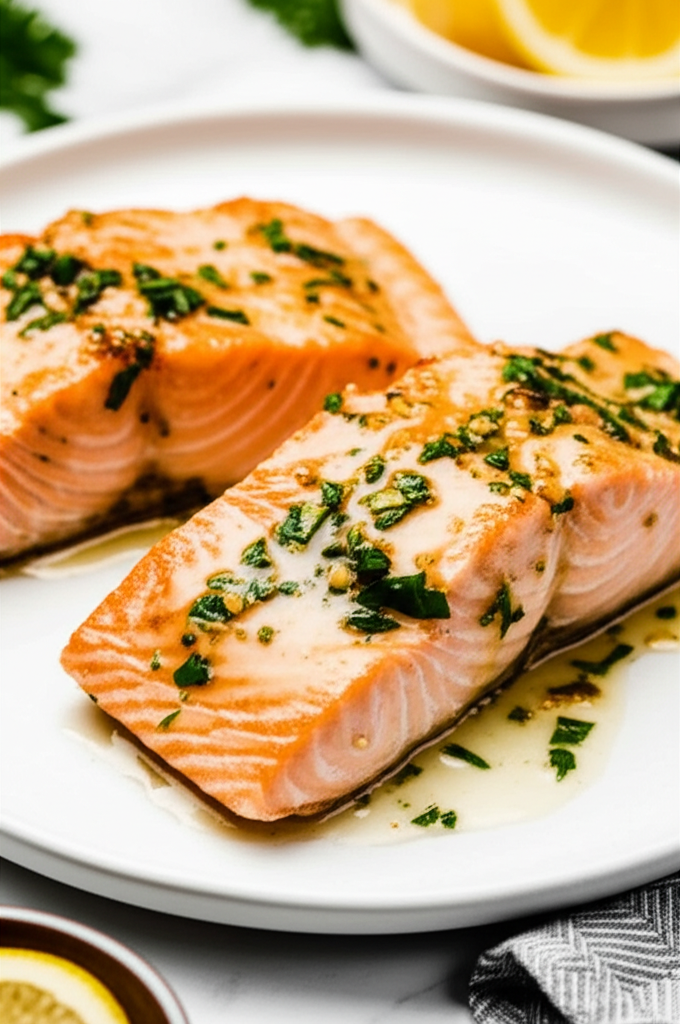
Put the garlic lemon butter sauce on top of the salmon fillets that have been seared.
Add chopped fresh parsley on top for a pop of color and taste.
6. Serve and have fun:
Serve your salmon right away with garlic lemon butter sauce and any side dishes you choose. It goes great with steamed veggies, mashed potatoes, or a light salad.
Your family and guests will be impressed by how good this food tastes and how it looks. The salmon, lemon, and butter sauce all work together to make a perfect combination of flavors that will make your taste buds dance. It’s great for big occasions or a weeknight dinner when you want to do something special for yourself.
Source: cookingclassy.com
Time to cook: 40 minutes
Spice Blend for Fried Chicken
- 4 teaspoons of smoked paprika
- 3 teaspoons of onion powder
- 3 teaspoons of garlic powder
- Three teaspoons of kosher salt
- 2 tablespoons of black pepper that has been finely ground
- 1 tablespoon of Italian seasoning
- 3 teaspoons of ground cayenne pepper
Buttermilk Brine
- 2 ½ cups of buttermilk
- ¼ cup of Louisiana hot sauce
- 4 lbs. of fried chicken whole chicken sliced into pieces, like thighs, drumsticks, wings, and/or breasts (with bones and skin)
For Dredging and Frying
- 3 cups of all-purpose flour
- 1 cup of cornstarch
- 5 tablespoons of baking powder
- Four cups of peanut oil
To Make a Spice Mix
In a medium bowl, mix together the smoked paprika, onion powder, garlic powder, salt, black pepper, and cayenne pepper.
To Brine Chicken
In a big basin, mix together the buttermilk, half of the spice blend, and ¼ cup of hot sauce until smooth. Use a tiny knife or fork to poke holes all over the chicken pieces. Then, put the chicken in buttermilk brine, cover it, and put it in the fridge for three hours or overnight. Overnight is an optional stage, however it is strongly encouraged.
To Dredge and Fry Chicken
In a 12-inch straight-sided cast-iron skillet over medium-high heat, heat the oil to 325°F. Set the oven to 200°F.
As the oil warms up, mix the flour, cornstarch, baking powder, and the rest of the spice combination in a large basin. Add the chicken in groups of four to the flour (I prefer to do one breast, wing, leg, and thigh) and toss it about to coat it evenly. Shake to get rid of extra flour.
When you add some flour, the oil gets heated and bubbles a little. Put the chicken in the pan with the skin side down. Change the heat as needed to keep the temperature. Put the thighs and wings in the middle of the pan and the breast and legs around the perimeter. The oil should fill the pan halfway. Cook the chicken for about 6 to 8 minutes on each side, or until it is golden brown. The most crucial thing is that the inside should be about 165°F when it’s fully cooked.
Put the chicken on a wire rack on a baking sheet with a rim. The thickest part of the meat should read 165°F on an instant-read thermometer. Put it in the warm oven while you fry the next batch. Serve the chicken hot.
Additional Tips
Chicken Pieces: You can alternatively use 4 pounds of your favorite bone-in, skin-on chicken pieces, such breasts, thighs, drumsticks, and/or wings, if you don’t want to start with a whole fried chicken.
Brining Time: Any time spent marinating is better than none, but I would suggest at least four hours. Eight hours is the best amount of time to produce juicy, tasty chicken from the buttermilk marinade. You can let it sit for up to 24 hours, but if you leave it sit longer, the chicken’s texture will suffer.
Resting Time: After dredging, let the chicken sit for 20 to 30 minutes. This helps the coating cling to the meat.
Fry Time: For this recipe, you can use any combination of chicken parts, such as wings, chicken breasts (white meat), drumsticks, or thighs (dark meat). Fry the drumsticks for 12 to 14 minutes, the thighs for 13 to 15 minutes, the wings for 10 to 12 minutes, and the breasts for 15 to 18 minutes. Use a meat thermometer to check that the thickest portion of the chicken has reached 165°F (74°C) to make sure it is fully cooked.